Digital Signage Playlist and Scheduling: Create and Schedule Content
Learn how to create a digital signage playlist, assign content to screens, and schedule content by day, date, and time with Vuubl.
How Playlists and Schedules Work
A digital signage playlist is an ordered collection of images, videos, and apps that a screen plays in sequence. A digital signage schedule decides which playlist appears on each screen and when it changes.
With Vuubl, you can create content once, assign it to a screen, and schedule recurring or one-time updates by day, date, and time. That makes it easier to switch between breakfast menus, lunch promotions, announcements, and other time-sensitive content without changing each screen manually.
For the broader workflow, see how Vuubl works.
What You’ll Need
- A Vuubl account (free trial available)
- A screen with the Vuubl app installed — follow our Android TV guide if you haven’t done this yet
- Images or videos you want to display (optional for now — you can use sample content)
Step 1: Log into Your Dashboard
Go to app.vuubl.com and sign in. You’ll land on your dashboard — this is where you manage your screens, schedules, content library, playlists, and layouts.
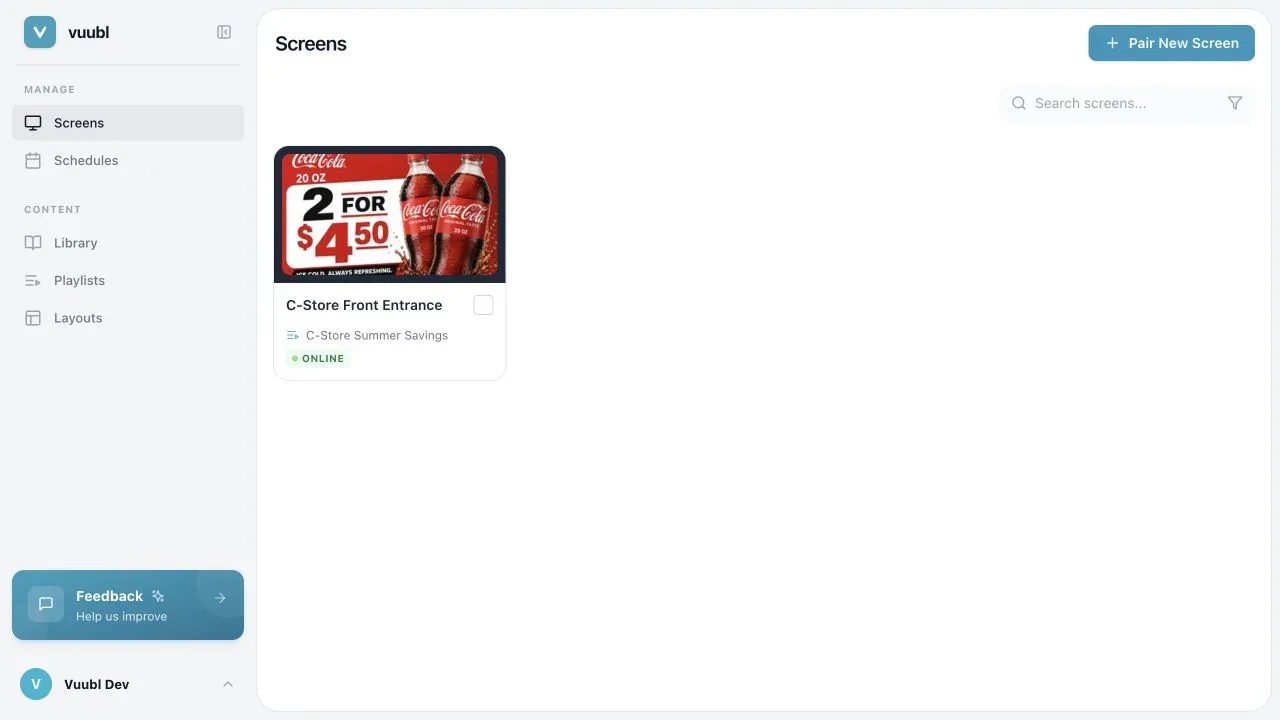
The sidebar on the left gives you quick access to all the main sections. Don’t worry if it looks like a lot — you only need Playlists and Screens to get started.
Step 2: Create a Playlist
Playlists are the core of your digital signage. They hold the content you want to display and control the order and duration of each item.
- Click Playlists in the sidebar.
- Click the New Playlist button.
- Give your playlist a name (e.g., “Main Menu Board” or “Lobby Welcome”).
- Click Create.
Your playlist is now ready. It’s empty, but we’ll fill it in the next step.
Step 3: Add Content to Your Playlist
You can add two types of content to a playlist:
| Content Type | Best For |
|---|---|
| Assets | Images or videos uploaded to your library |
| Apps | Embedded web pages, announcements, weather feeds, and more |
To add content:
- Open your playlist from the Playlists page.
- In the playlist editor, use the Library pane on the right.
- Click ASSETS to filter uploaded media, then click an asset to add it. Choose APPS to add a web integration.
- Adjust the duration for images and apps, or choose Play to end / Fixed duration for videos.
- Drag and drop items to reorder them.
Video uploads must be MP4/H.264 or HEVC/H.265, or WebM/VP8-9, no larger than 100 MiB, and no longer than 5 minutes. There is no resolution restriction. Vuubl uploads the video and a browser-generated thumbnail directly to storage, so large videos do not pass through the application server. Mixed uploads keep valid files and show a rejection reason for each invalid file.
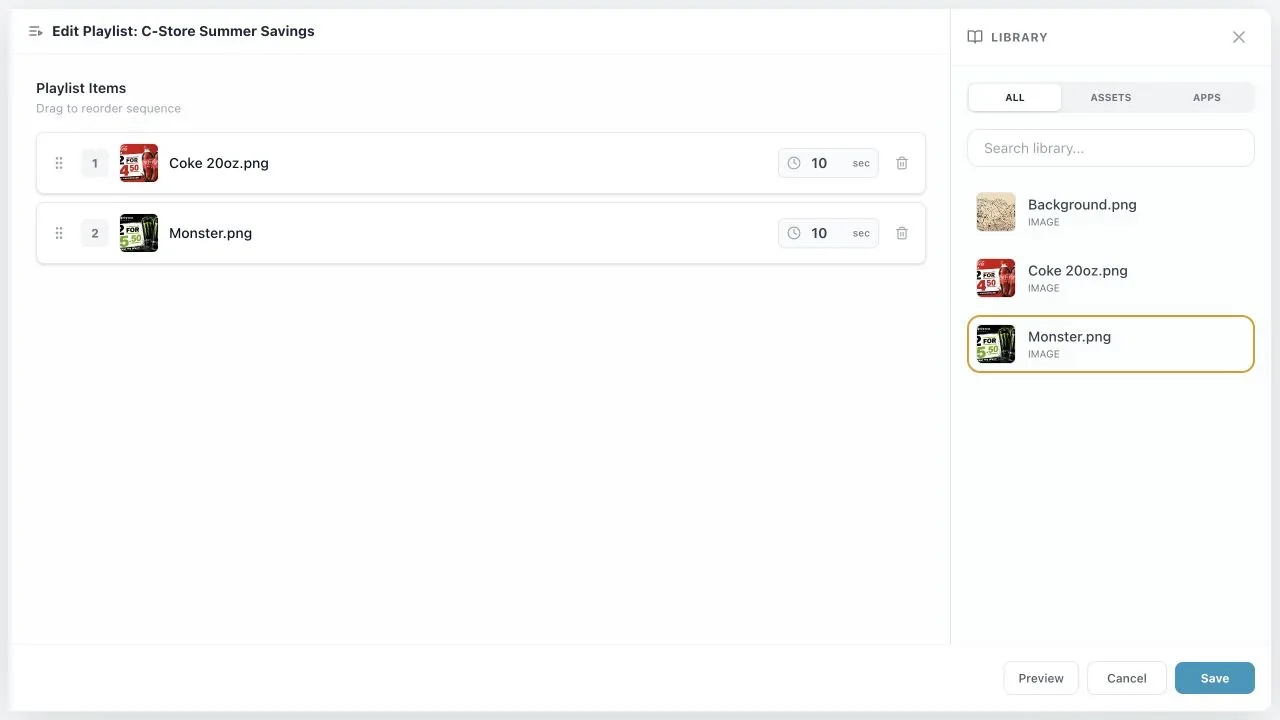
Pro tip: Keep each image or app on screen for at least 8–10 seconds so viewers have time to read it. Videos play to the end by default, or you can choose a fixed whole-second duration to advance before the video ends.
Step 4: Assign Your Playlist to a Screen
Your content is ready. Now you need to point it at a screen.
- Click Screens in the sidebar.
- Find your screen in the list (it should show as “Online” if paired correctly).
- Click the screen to open its settings.
- Under Content, click Playlist and select the playlist you created.
- Click Save.
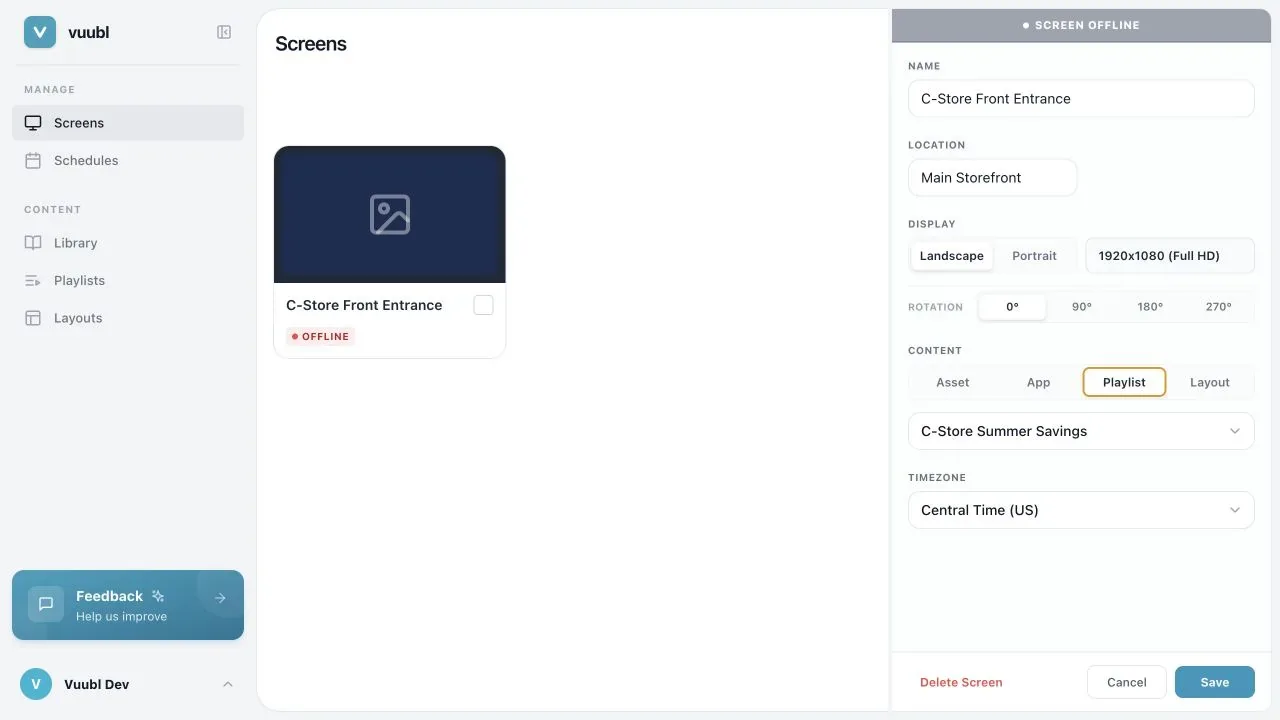
Your screen will update within a few seconds. Walk over and check — you should see your content playing!
Step 5: Schedule Digital Signage Content
If you want different content to show at different times — like a breakfast menu in the morning and a dinner menu in the evening — use the schedule feature.
- Click Schedules in the sidebar.
- Click Add Schedule.
- Enter a schedule name, then choose the screen you want to schedule.
- Choose Recurring and select the days, or choose One-time and set start and end dates.
- Set the start and end time (for example, store opening through closing).
- Under Content, choose Playlist and select the playlist to show during the scheduled window.
- Click Create Schedule.
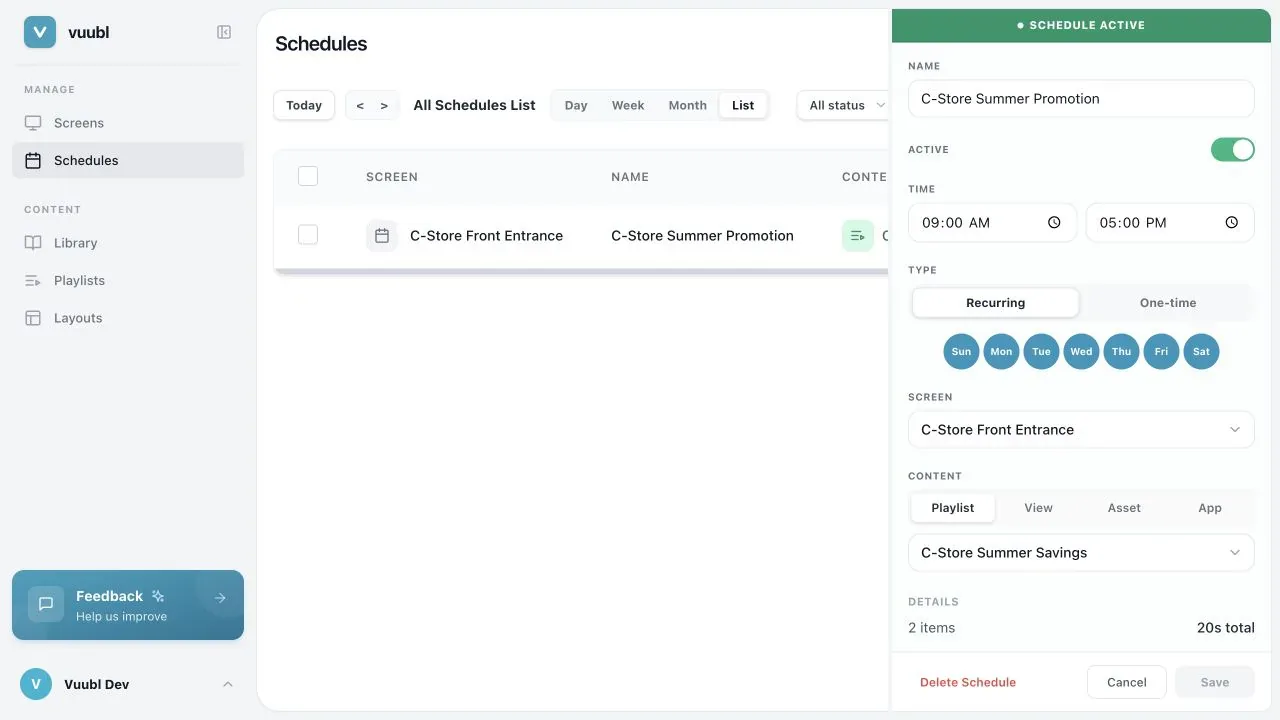
Schedules support recurring daily or weekly patterns, so you set it once and it runs automatically.
Your Content Is Live
That’s it. Your digital signage is now showing your content on a real screen. Here’s a quick recap of what you just did:
- Created a playlist to organize your content
- Added assets or apps to the playlist
- Assigned the playlist to a screen
- Scheduled content to show at specific times (optional)
Next Steps
- Read about Digital Signage for Small Business for ideas on what to display
- Explore creating a Digital Menu Board for restaurants
- See restaurant digital menu board software and convenience store digital signage software for industry-specific workflows
- Review Vuubl pricing for per-screen plans and the free trial
- Contact Support if you need help — we typically respond within a few hours