How to Create a Restaurant Digital Menu Board
Plan, install, design, and schedule a readable restaurant digital menu board, from choosing equipment and screen placement to handling dayparts and sold-out items.
Published July 29, 2026
By Vuubl Team
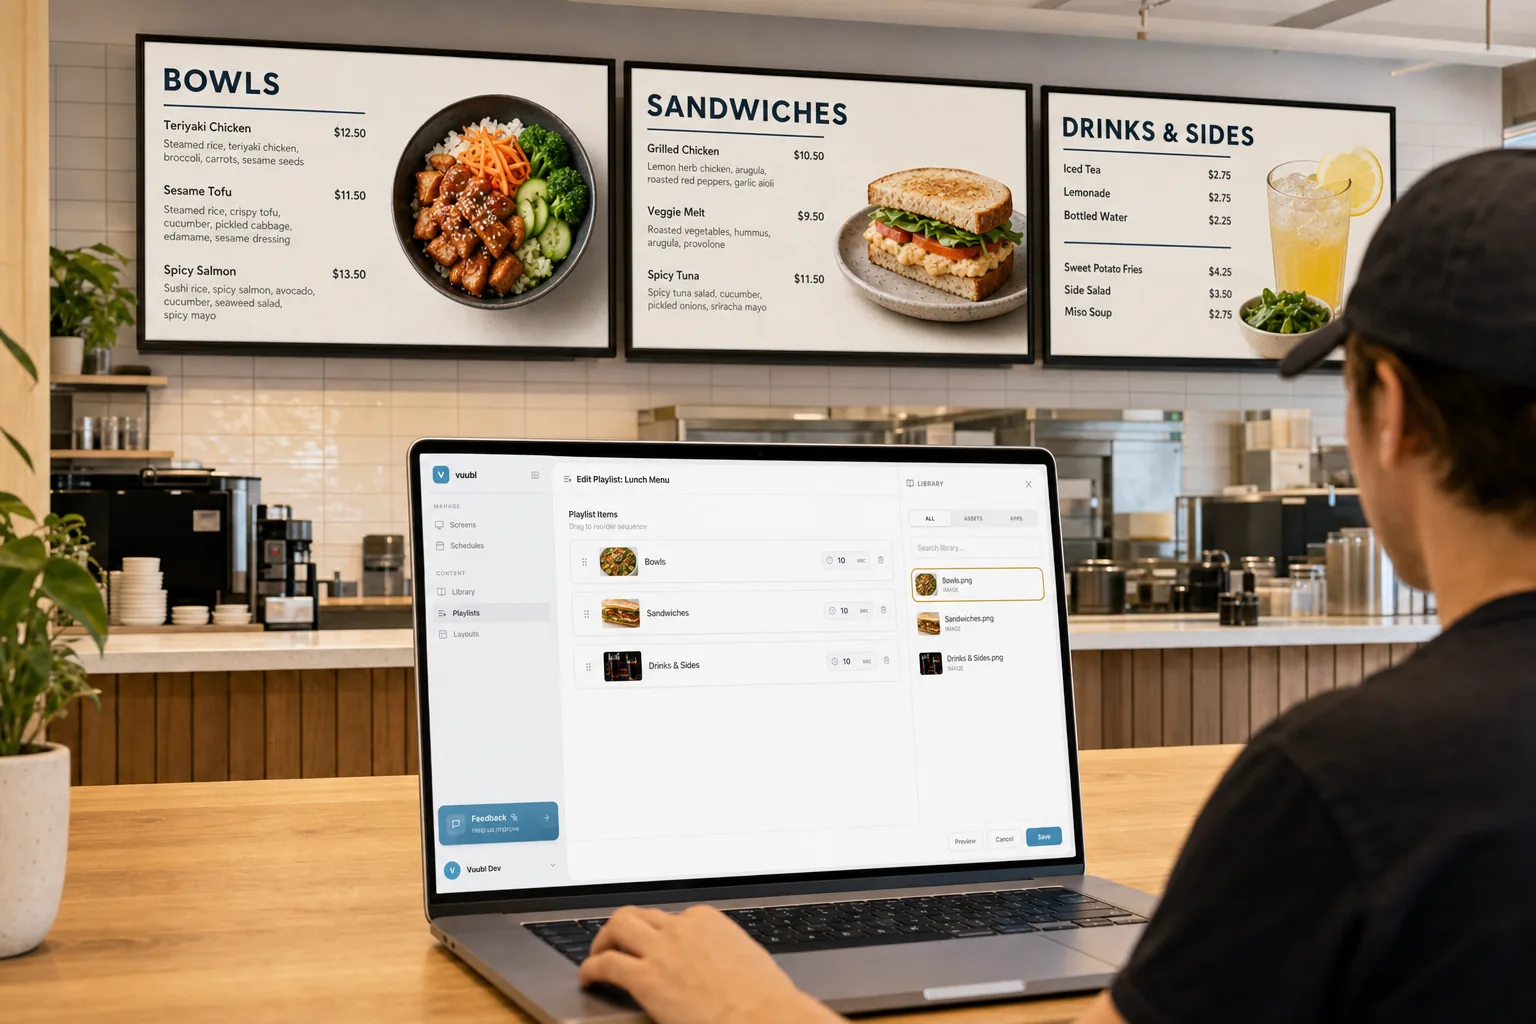
A restaurant digital menu board is more than a television with a menu image on it. A useful setup helps guests understand what you sell, compare choices, find prices, and order without slowing the line. It also gives your team a practical way to change content when breakfast ends, a promotion begins, or an item sells out.
This guide walks through the complete process: choosing equipment, deciding where screens belong, designing readable menu content, coordinating side-by-side displays, scheduling dayparts, testing the result, and managing more than one location.
1. Define what each screen needs to accomplish
Start with the ordering experience rather than the screen itself. Stand where a guest normally joins the line and note the questions they need answered before reaching the register:
- What categories are available?
- Which items belong in each category?
- How much does each item cost?
- Are there sizes, combinations, or add-ons?
- What is available only at certain times?
- Which offer deserves extra attention today?
Give each display a clear job. One counter screen might carry the primary food menu, a second might cover drinks and combinations, and a third might feature limited-time offers. A pickup-area display may need order guidance instead of another complete menu.
Trying to place every message on every screen usually produces smaller type and slower decisions. Prioritize the information needed at that exact point in the guest journey.
2. Plan restaurant digital menu board installation
A restaurant digital menu board installation needs more than a television with a menu image. You need a compatible display, a way to run the digital-signage player, reliable power, and network access for synchronization.
Select displays for the viewing distance
Screen size should match how far away guests will read the menu. A large television does not automatically solve readability if the design uses small type. Before buying hardware, mock up the menu at full-screen size and inspect it from the expected ordering position.
For side-by-side screens, use matching display sizes and orientations when possible. Consistent bezels, brightness, and mounting height make a multi-screen menu feel like one system instead of unrelated televisions.
Decide how the player will run
Vuubl can run through a supported modern web browser or the Vuubl app on compatible Android TV hardware. The best choice depends on the hardware you have already tested, how the device behaves after a restart, and how easily staff can recover it.
Avoid planning around vague “smart TV” compatibility. Verify the exact display or player model you intend to deploy, including automatic startup, orientation, video playback, temporary offline behavior, and recovery after power loss. See how Vuubl digital signage works for the basic connection and publishing workflow.
Plan power, networking, and mounting
Hide cables where practical, keep player hardware ventilated, and make sure staff can reach it for troubleshooting. Use secure commercial mounting appropriate for the wall and display weight. If screens sit above a hot kitchen line, account for heat, grease, glare, and local safety requirements.
Use this installation checklist before staff rely on the screens:
- Securely mount each display at a readable height and viewing angle.
- Connect the player, power, and network access, then confirm the device restarts correctly.
- Install the supported browser or Android TV player and pair each screen with the correct workspace.
- Verify the screen orientation, resolution, brightness, and content assignment.
- Test a real menu update, schedule transition, and temporary network interruption before opening.
3. Place screens where guests can read them
Mount the primary menu where customers naturally look before ordering. The correct location depends on the room, line direction, ceiling height, counter position, and potential obstructions.
Check the view from several points:
- The entrance or queue start
- The middle of the line
- The ordering position
- Accessible viewing positions
Avoid locations where pendant lights, windows, or glossy surfaces create glare. A menu mounted too high may be visible but uncomfortable to scan. A screen behind equipment, plants, hanging signs, or staff traffic can lose useful space even if the television itself is large.
If customers cannot read the smallest essential item name and price from the normal queue, revise the layout or placement before launch.
4. Build a clear category and price hierarchy
Guests should understand the menu structure within a few seconds. Use familiar categories such as Breakfast, Sandwiches, Bowls, Sides, Drinks, or Desserts. Keep category headings visually consistent and avoid clever labels that require explanation.
Within each category:
- Put item names and prices on a predictable line.
- Keep descriptions short and use them only when they help the decision.
- Align prices consistently.
- Use size options or modifiers in one repeatable format.
- Separate categories with space rather than heavy decoration.
The most important information should receive the strongest contrast. Decorative details should never compete with item names, prices, allergen information, or ordering instructions.
5. Design for readability at a distance
Design the menu at the resolution and aspect ratio of the target display. A file that looks comfortable on a laptop may become dense when viewed across a restaurant.
Use a limited type system: one style for category headings, one for item names, and one for supporting details. Favor strong contrast, adequate spacing, and plain backgrounds behind essential text. Avoid thin type, long italic passages, all-cap descriptions, and low-contrast color combinations.
Test with real conditions rather than relying only on a design preview. Display the menu on the actual television, step back to the ordering distance, and ask someone unfamiliar with the design to find several items and prices. If they must squint or search, simplify.
6. Use food photography selectively
Food photography can help feature a signature item, seasonal offer, or high-priority combination. It becomes less effective when every item has a competing image.
Use a small number of high-quality, accurate photos. The food shown should resemble what the guest will receive. Keep lighting, crop style, and background treatment consistent. Never let a photo force essential menu text into a narrow or crowded area.
A practical starting point is one featured image per screen—or no photography on screens that carry dense price information. Video and animation should also be restrained so motion does not make the core menu harder to read.
7. Coordinate side-by-side menu screens
Treat multiple screens as a coordinated system, but do not place critical information across a bezel. Each display should remain understandable on its own if another screen restarts or is temporarily unavailable.
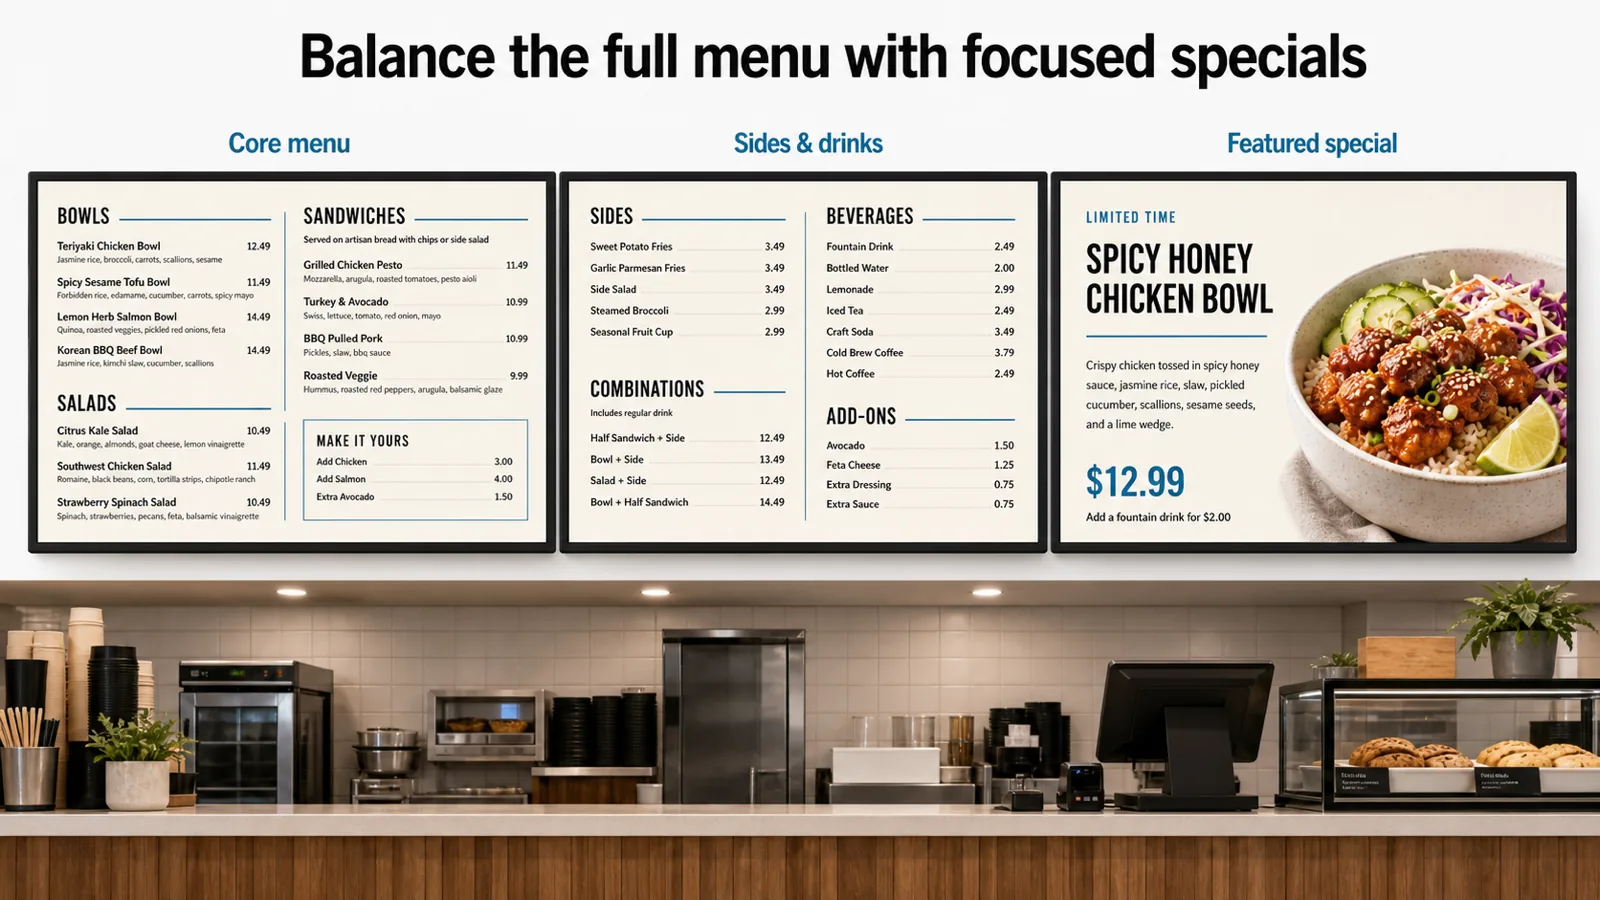
Divide content by stable categories. For example:
- Screen one: main dishes
- Screen two: combinations, sides, and upgrades
- Screen three: beverages, desserts, and a limited-time offer
Use the same grid, type scale, spacing, and color rules across the set. Check that category order follows the direction guests naturally scan. With Vuubl, screens can receive different playlists, layouts, or scheduled content while being managed from the same workspace.
8. Prepare breakfast, lunch, and dinner schedules
Daypart scheduling reduces the need for staff to replace menu content during service. Create separate designs or playlists for breakfast, lunch, dinner, happy hour, and late-night periods when the available items differ.
Before publishing a schedule, confirm:
- The restaurant’s timezone is correct.
- Start and end times match actual kitchen availability.
- Overnight periods behave as expected.
- Weekend and holiday hours are accounted for.
- A sensible default menu exists outside scheduled periods.
Leave enough transition time for the kitchen and register system. A menu should not advertise lunch items before staff can prepare or sell them. Learn more about Vuubl’s menu-board scheduling and remote management, or follow the digital signage scheduling guide for the step-by-step workflow.
9. Plan for sold-out items and price changes
Decide who is allowed to request or publish updates and what source confirms the correct price. A fast update is only useful when it is accurate.
Keep editable source files organized by location and daypart. When an item sells out, replace the relevant menu artwork or assign prepared alternate content, then publish it to the affected screens. Avoid improvised overlays that make the menu look inconsistent or hide nearby prices.
For frequently changing availability, prepare alternate versions in advance. Your process should include a quick visual check after every remote menu-price update.
10. Test before guests depend on it
Run a complete launch test during both quiet and busy conditions. Review every screen for:
- Correct orientation and resolution
- Readable item names and prices
- Accurate categories, hours, and availability
- Correct screen assignments
- Smooth image and video playback
- Daypart transitions
- Temporary Wi-Fi interruption behavior
- Recovery after browser, player, device, and power restarts
Ask a staff member who did not build the menu to follow the update procedure. If the process depends on one person remembering undocumented steps, write a short operating checklist.
11. Standardize multiple restaurant locations
For more than one location, separate shared brand rules from local information. Typography, colors, spacing, and core product photography may remain consistent, while prices, taxes, hours, availability, and promotions can vary.
Use a naming convention that includes location, screen position, orientation, daypart, and revision date. Confirm changes on a small group of screens before applying them broadly. Maintain an owner for menu accuracy at each location and a clear approval path for company-wide updates.
Central management should reduce repetitive work without erasing legitimate local differences.
Measure the menu board after launch
A digital menu board is working when it makes the ordering and update process easier to manage. Choose a few practical measures before launch so you can improve the system based on evidence rather than guesswork:
- How long does it take to update a price or remove a sold-out item?
- How often do screens show an outdated menu, wrong schedule, or missing promotion?
- Which menu questions do guests still ask at the counter?
- Which promotions or featured items deserve another test based on sales or staff feedback?
- Do screens reconnect and resume normally after a temporary network or power interruption?
Review these questions weekly during the first month. If a screen is technically online but guests cannot read it, the problem is still a design or placement problem. If staff avoid making updates because the workflow feels risky, simplify the approval and publishing process.
Avoid common restaurant digital menu board mistakes
The most common problems are operational rather than visual. Avoid launching a board that:
- Uses one crowded layout for every screen and daypart
- Places essential prices in small type below decorative content
- Depends on a single person to make every urgent update
- Publishes a schedule without checking the restaurant’s actual hours
- Spreads critical information across multiple screens or behind a bezel
- Has no documented fallback for a player restart, network interruption, or sold-out item
Start with a small, dependable system. You can add more zones, animations, and promotions after the core menu is accurate and easy to maintain.
Set up a restaurant digital menu board with Vuubl
The basic Vuubl workflow is straightforward:
- Create a Vuubl account.
- Connect a supported browser or Android TV player to your workspace.
- Upload finished menu images or videos.
- Build playlists or multi-zone layouts for the screens you need.
- Assign the correct content to each restaurant display.
- Add schedules for breakfast, lunch, dinner, and promotions.
- Publish and verify the result on the physical screens.
Review Vuubl pricing for monthly and annual per-screen options, explore the restaurant digital menu board software page for restaurant-specific workflows, or follow the digital signage scheduling guide for the publishing steps.
Launch with one clear, tested menu
The strongest first version is not the busiest one. Start with accurate categories, readable prices, a small number of useful visuals, and a dependable update process. Test it from the guest’s point of view, document how staff request changes, and add more complexity only when it improves ordering.
Start your first Vuubl screen free for 30 days, with no credit card required.